Cross stitch, Needlecraft and Embroidery Glossary: Waffle stitch to Woven Picot
A comprehensive illustrated needlecraft dictionary with clear definitions and working diagrams. Includes 766 terms used in cross stitch, embroidery, tapestry, blackwork, and goldwork. (Click thumbnails to enlarge.)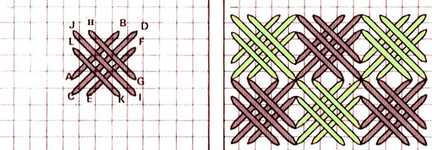
Work three diagonal stitches over 3, 4, and 3 stitches in one direction followed by three stitches in the opposite direction also over 3, 4 and 3 intersections. This can be worked in one colour or two as shown. Also known as broad cross stitch.
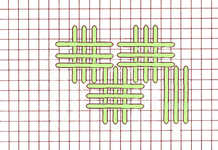 A variation is to work the stitches horizontally and vertically. First work three stitches over six threads vertically and then three stitches over six threads horizontally interlocking as shown. Also known as broad cross stitch.
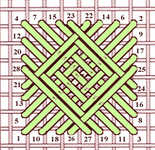 Another version of waffle stitch is worked over a square of an odd number of threads as shown following the number sequence and is also called norwich stitch.
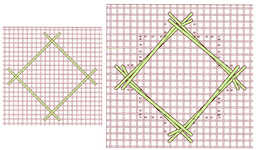
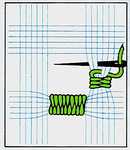
This is used as a feature stitch. Work the basic grid with four long stitches as illustrated and then continue following the numbers each stitch passes under the intersection at one of the four corners but without passing through the fabric thus bending the thread. The finished worked stitch is as shown.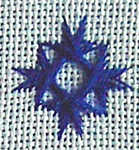
It is specially made so that it can be frayed and removed after the cross stitch is worked. This technique is called overlaying

Make a row of straight stitches along the top of the shape to be covered, coming up at A, down at B and so on. Using a blunt (tapestry) needle come out at C, slide the thread through the first stitch of the row and then insert the needle again at D, on the same line as C and then out again very close at E and slide through the next stitch in the line and so until the end of the second row. On the next row come out at F and slide the needle through one stitch as before but the following stitches all slide through two loops of the row above as shown until the end of the row when the needle passes through only one, the last stitch. Continue building up rows in this way until the shape is filled.
Also a stitch used in smocking. This is a decorative stitch worked after the pleats have been gathered and basic smocking stitches such as outline stitch have been worked. 
Work one downward cable. Keeping the thread below the needle move up halfway to the next gathering thread and pick up the next pleat. Work one upward cable. Also know as chevron stitch.
 In pulled thread embroidery wave stitch is made up of diamonds as illustrated.
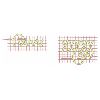
Work from right to left. Bring needle up two threads in from end. Make first stitch two threads to the right and four threads up then bring needle out again four threads to the left. Insert needle at starting point and bring out four threads to the left. Continue in this way to the end of the row. To work next row turn fabric round then work in the same way as before.
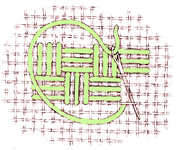
In the counted thread, groups of four stitches are worked over four threads alternating horizontal blocks with vertical blocks as shown. Because there is a slight overlap between the horizontal and vertical stitches it gives the appearance of weaving.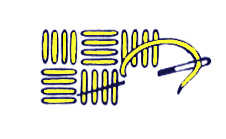 The free embroidery is worked in exactly the same way. Also known as basket satin stitch and basket filling stitch.
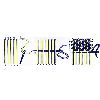
Come out and A and insert needle again at B coming up again adjacent at C leaving a thread width between lines as shown. Change to a blunt (tapestry) needle and contrasting colour come up at M at the centre of the square to be covered, weave as shown and then insert needle again at N. Come out again at O and continue weaving in that direction, pushing threads together so that even squares of colour are obtained. When that side is complete start at the centre again and weave in the opposite direction.

Bring the needle out at A and insert at B making a tent stitch over one thread of the fabric. Come out at C, one thread above and one to the left of B. Insert the needle again at D, one stitch below and one to the right of B, making a long slanting stitch over two intersections. Come out again at E, one thread immediately above B, Insert the needle at F making a small stitch across the slanting one and come out again at G on the other side of the stitch, one thread below and one to the right of E. Insert the needle at H, over the stitch, one thread to the left and one below G. Come out again at J. Then make another long slanting stitch, starting one stitch above C and ending one stitch to the right of D over three intersections. Work all the way back by the same method as before, placing slanting stitches across the line alternating with those of the previous row.
The finished effect has the appearance of diagonal weaving.
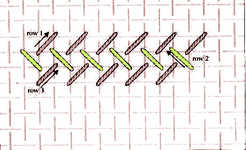
Rows are worked alternately from left to right and right to left with slanted stitches over two threads in opposite directions using one or two shades as illustrated.
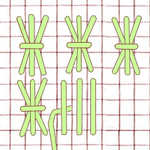
Work three straight stitches over four or six fabric threads and tie them together with a small stitch across the centre as shown. The y can be worked closely or spaced with tent stitch filling.
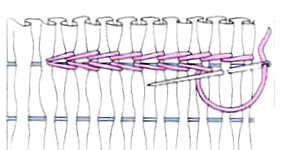
After the temporary stitches have been worked, this basic smocking stitch is worked around the tacking threads. It is not very elastic and serves to keep the work taut. Pick up a pleat just above the gathering thread. Keeping the thread above the needle, work a row of outline stitch and then keeping the thread below the needle work a row of stem stitch directly beneath.
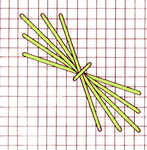
A decorative stitch that can be worked in one colour or with a contrasting thread used for the short binding stitch.
Work the long diagonal stitch first over 12 intersections followed by the two stitches either side one thread away from the first stitch, then the two stitches either side of these, worked two threads away. Finally work the short stitch over two threads on the opposite diagonal to the original stitch.
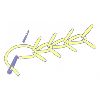
Work from top to bottom. Bring thread through on stitch line just below top. Make a diagonal straight stitch to left and another to right, bring needle through again below staring point. Without needle entering fabric take thread under the two straight stitches and insert at same place as before. Then make two more straight stitches and work along stitch line in this way.
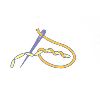
Having worked a line of backstitch, bring needle out at same place as one stitch then take thread over and under each backstitch without entering fabric.
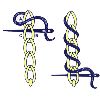
Make a row of chain stitch. Then changing to a blunt (tapestry) needle, bring it out and A cross to the right and slide the needle through the two loops from B to C without entering the fabric. Continue under each link being careful not to pull the thread too tight.
The finished effect is like a raised cord.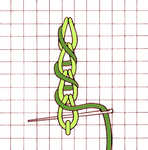
As a counted thread stitch, make a row of chain stitch. Then using a thread in a contracting colour, bring it up through the fabric beside the thread and a the top of the first chain. Bring the needle diagonally across the first chain and pass the needle under the loop of the second chain. Repeat this movement, not piercing the fabric until all the chain stitches have been worked over. The loops can be pulled tight to make a narrow raised cord effect or less tightly depending on the effect required.

Work two small stitches to make V shapes at regular intervals along two parallel lines. Then zigzag between the lines as shown without the needle entering the fabric. Also known as astypalea stitch.
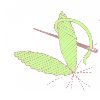
Work satin stitch but pull each stitch tight. Work whipping stitches at right angles as shown in diagram.
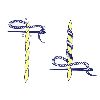
First work a line of stem stitch then coming up at A, change to a blunt (tapestry) needle and pass from B to C where stem stitches overlap each other, passing only under the stitch and not through the fabric. Continue to end to give the effect of a raised cord.
This can be used when working a piece of free embroidery which can also be seen from the reverse, such as table linen. If stem stitch has been used, you can whip those stitches on the reverse to give a similar appearance to the front.
It`s based on satin stitch worked on closely woven materials such as linen, lawn or cambric. Styles incluse Dresden work, Ayrshire work, mountmellick work Carrickmacross and Coggeshall embroidery.
Stitches which can be used in white work include, trailing, seeding, padded satin, chain stitch, shadow stitch, shadow appliqué, mountmellick, point turc and point de paris
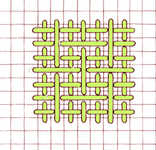
Work upright crosses each over two threads first, working backwards and forwards across the canvas.
When the area is covered work long vertical stitches between them over four threads as shown, working diagonally down the area. Finally work the long horizontal stitches also over four threads. It is easier to quarter the canvas and work as before.
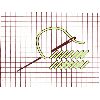
This is often trammed in needlepoint. Bring needle through and up right diagonally across fabric over two inter sections to form the first stitch, insert needle and pull through one thread left of base of previous stitch to form the next stitch. Continue in this way in this row and following. This stitch can up worked over up to five horizontal fabric threads and one or two vertical fabric threads. 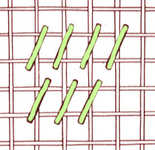
This also known as oblique gobelin stitch or slanting gobelin stitch.
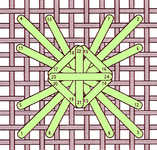
Begin with a large cross stitch over eight fabric thread intersections, then work the other spokes of the windmill sails. Work four diagonal stitches over these as shown finishing with an upright cross in the centre. A large stitch which can be worked in two colours, the second six stitches in a different shade from the first six.
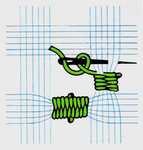
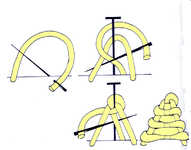
Make a single loop and insert a dressmaker's pin over the loop and into the fabric to keep it firm. Slip the thread through the loop and tighten to form the top of the picot. Then make a series of weaving stitches until the edge of the fabric is reached.


