Cross stitch, Needlecraft and Embroidery Glossary: Sampler to Swiss embroidery
A comprehensive illustrated needlecraft dictionary with clear definitions and working diagrams. Includes 766 terms used in cross stitch, embroidery, tapestry, blackwork, and goldwork. (Click thumbnails to enlarge.)See also band sampler.
They must not be too long or they may be pulled out of shape. If liked the shape can be padded with running stitch or felt.
Variations include surface satin stitch or laid work, slanting, knotted, alternating, encroaching, padded and satin stitch tied with backstitch.
The counted thread version is worked similarly either horizontally, vertically or diagonally between fabric threads.
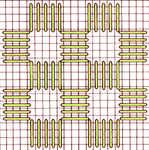
Work the groups of five stitches over four threads of each box in horizontal; rows backwards and forwards across the fabric, leaving four threads between rows, then work the vertical rows up and down the canvas. The boxes can be worked larger or smaller if required and a decorative stitch can be worked in the centre. 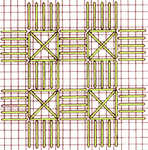
One possibility is to work four sided stitch and cross stitch in the space as illustrated. The boxes are worked pulled, followed by the four sided stitch and then the central cross stitch, pulling all the stitches hard.
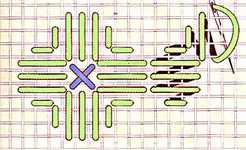
Straight Satin stitches worked over 2,4,4,4,2 threads and worked round to form a flower. The centre is worked with a cross stitch. Also known as flower stitch.
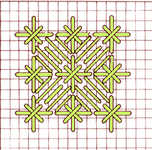
A variation on flower stitch or satin stitch flower. Work double cross stitches as shown and then satin stitch petals between the double crosses. The double cross stitches and flowers can be worked in different colours.
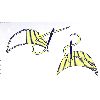
Outline the shape with split stitch, and work satin stitch over it. Work a row of backstitch through the centre of the shape using the upper edge as a guide line. The needle comes up at A and down at right into the hole made by the last stitch.
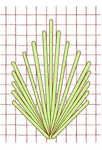
A large stitch worked over eight vertical and twelve horizontal fabric threads, each stitch radiating from one place as shown. It is worked in horizontal rows with the second stitch sharing the same space as the five rightmost stitches. Subsequent rows are worked into the spaces between the preceding to cover the fabric.
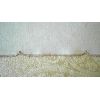
Cardboard templates are used to draw shapes on the edge evenly and a second row can be drawn the depth of the required stitch on the inside of the fabric. The edge can then be cut and buttonhole stitch worked close together all round scalloped edge.
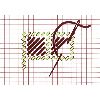
Working downwards from left to right, work a square over diagonal stitches, first over one thread, then two, three, four, three, two and one. This square is then framed with tent stitch in another colour .
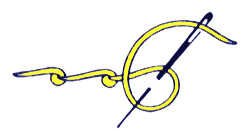
Work from left to right. Bring needle up at end of line to be covered and ,make a loop of thread as shown. Insert needle in the centre of the loop along the line to be covered and pick up a small amount of fabric. Pull loop tightly under point of needle and then draw needle through.

Two backstitches are worked into the same hole to make a raised dot. This can be worked regularly as illustrated or as an outline or randomly. It is also known as simple knot stitch, rice grain or dot stitch.
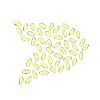
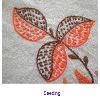
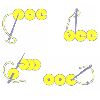
If the holes are small it is best to attach with a beading needle. There are several methods of attaching sequins.
Overlapping - This is the most usual method, sewing the sequins on with a backstitch Work from left to right. Bring needle through fabric on design line the length of a sequin from the end. Place sequin in position so right edge is at end of design line and hold it in place with thumb. Insert needle through hole in sequin from top and into fabric as shown in diagram and bring out again on design line the length of a sequin from the centre of the first sequin. Place second sequin on fabric with half of it overlapping first sequin and sew in place in same way as before. Continue along line.
Individually - This method has a stitch going over half a sequin. Work from left to right. Bring needle through fabric on design line, a little way in from end then bring it out again along line to left so that when the next sequin is threaded on it will lie edge to edge with the first sequin. Repeat along line.
With a decorative stitch - In this method the stitching goes right across the sequin so it forms part of the design. Work as for individually but bring needle out again at left edge of first sequin then work back through hole of sequin. Continue working twice into the hole of each sequin in this way.
With a bead - No thread shows over the sequin in this method as it is held in place by the bead. Bring needle through fabric at place where centre of sequin is to be. String sequin and then bead onto thread. Take needle back through hole in sequin and through fabric and pull through. Bring needle out again in position for next sequin.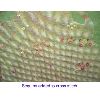
Sequins can be added to cross stitch by slipping the needle through the sequin on the second half of the cross.

This is worked in blocks by making four vertical stitches over four fabric threads and three horizontal stitches covering those over five threads to seven stitches in all.
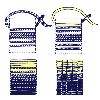
Working with three blending shades, start at centre with medium shade and work one third of the shape in close laid work . On either side of this area work two or three lines spaced widely apart. Fill in the spaces to the top with the light thread and the spaces to the bottom with the darker shade. When complete hold the work flat with rows of split stitches at right angles using the medium shade.
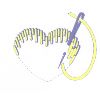
The first row of stitches are alternately long and short stitches and the following rows are stitches of an even length until the last row of the area where stitch length is varied to finish the filling. 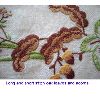
This can be used with fine shading colours. A version called surface long and short stitch is more economical with floss. Other names for this stitch are long and short stitch, embroidery stitch, tapestry shading stitch, plumage stitch, feather work and opus plumarium.
A piece of the same fabric or another white material such as satin is basted on the back of the background material. On the right side of the fabric the design is then outlined with point turc or point de paris and the extras material is cut away close to the stitching on the reverse.
The design is worked in closed herringbone from the back so that only small stitches are shown at the front but the colour shows from behind. It can be combined with other stitches on the front of the piece, 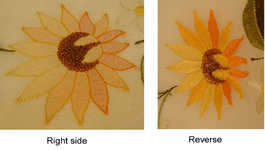 as in the photo which shows the front and back of the same piece of embroidery.
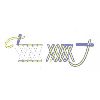
When shadow stitch is worked closed herringbone appears on the wrong side or vice versa. The effect is best if the stitches are taken very close together. Also known as Double backstitch.
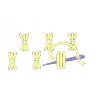
The overcast stitches are worked only over the satin stitches, the needle does not enter the fabric. The stitch groups are place alternately to make a chequered pattern
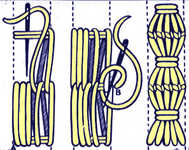
This is worked vertically upwards and begins by laying evenly spaced pairs of horizontal threads. Then bring the needle out at A just below the first bar and taking it over and under the second bar working from left to right. The same thread is then taken between the second and third bars working from right to left and in between each of the first set of vertical threads. Continue working upwards until the top. The next stage is to come out at B, pass the thread under the horizontal bar to the left of the two right hand vertical threads and pull until only a small loop is left and through this and pull tightly. Repeat across the row. When all these stitches are worked pull the 'sheafs' tightly in the centre with two horizontal stitches.

Make four long stitches over six threads leaving one thread between each stitch. When the fourth stitch is completed , bring needle through centre pair of horizontal threads and make a short horizontal stitch right across one thread and over the four long stitches drawing them together. Continue along row.
When completed use a contrasting thread to coil twine into horizontal stitches and work backstitch between rows to hide the fabric.
It originated in India and can form part of very elaborate designs. The mirrors are secured by a lattice of stitches. If using mylar, aluminium backed by linen hold in place with two small stitches and then work long stitches across the surface from A to B, C to D, E to F, G to H to make a square. Then add a diamond to the top of the square by stitches from I to J, K to L, M to N and O to P. Using a blunt (tapestry) needle come out at R close to the left hand edge of the circle . Slide needle under the holding threads and with the thread under the needle draw tight. Make a small stitch into the fabric from T to U and with the thread under the needle draw tight. Slide the needle under the holding threads again and draw tight and make another small stitch on the fabric from U to V anticlockwise round the circle. Continue right round the shape so that the holding stitches are completely hidden.

Draw out two or three threads from the fabric and then turn up the hem to one thread from the withdrawn thread. Work on wrong side from left to right with hem at top. Fasten thread at left and then pass thread from right to left under two of the border threads turning the needle to face horizontally. Then make another straight stitch across two threads at right angles to the first and repeat along the row. When a corner is reached work buttonhole stitches close together over both edges of hem.

Two backstitches are worked into the same hole to make a raised dot. This can be worked regularly as illustrated or as an outline or randomly. It is also known as dot stitch, rice grain or seed stitch.
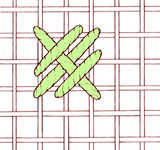
This is worked over three fabric threads with only two small diagonal stitches across the arm of the cross as shown.
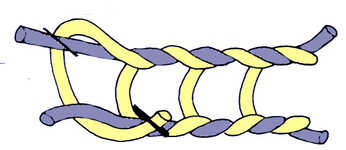
This is a wide composite stitch which can be used to encase ribbon or cord. Two contrasting threads are laid on the fabric in straight parallel lines. The chain stitch is then worked through these as shown in the diagram. When the line is complete the original threads are pulled tight and taken to the reverse to finish off.
This stitch is found in the traditional embroideries of Sri Lanka.
The threads are evenly spaced and can also have a different coloured thread at intervals. The fine canvas can be used with cotton threads for detailed work and the wider meshes with wools for rugs.
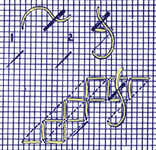
Bring needle out at 1, insert four threads to the right and bring out again four threads below point 1. Insert at 1 again and bring our four threads to the left of the lowest point as shown. Repeat to the end of the row pulling the thread tightly each time. Turn the work upside down and work another row alongside the first using some of the same holes.

Work from top to bottom. Bring needle out at top of line to be covered. Holding thread down with thumb, make a slanting stitch as shown and draw needle through over working thread..
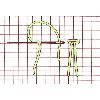
Working from right to left pass needle under two vertical threads to left leaving end about one inch long or as desired, then take needle back to right and insert one vertical thread to right of starting point bring needle out one thread to left of first insertion. Draw stitch tight and cut thread to same length as first thread thus forming a fringe. Continue like this working stitches close together.
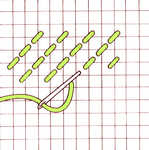
A feature of this stitch is a light lacy look. Great care has to be taken not to have any trailing threads over the area before beginning stitching an area and that the starting and finishing threads are well anchored and not visible. Follow the diagram carefully working diagonally.
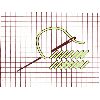
This is often trammed in needlepoint. Bring needle through and up right diagonally across fabric over two inter sections to form the first stitch, insert needle and pull through one thread left of base of previous stitch to form the next stitch. Continue in this way in this row and following. This stitch can up worked over up to five horizontal fabric threads and one or two vertical fabric threads. 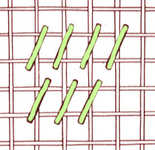
This also known as wide gobelin stitch or oblique gobelin stitch.
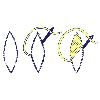
First outline the shape with split stitch, and then starting at the centre work slanting stitches close together coming up and going down outside the split stitch. When then side is finished, start again at the centre and work in the opposite direction, this makes the slope of the stitch more even
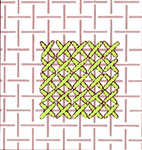
This is similar to cross stitch but each cross is worked over one fabric thread to give more dense coverage
Printed transfers of smocking dots in various sizes are available to be ironed onto the reverse of the work. The gathering is worked in a contrasting thread which is later removed.
Smocking stitches include outline stitch, stem stitch, cable stitch, wave stitch, diamond stitch, crossed diamond stitch and trellis stitch.
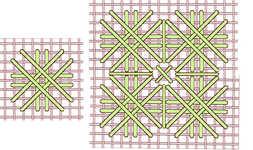
Work a single cross over four threads. Bring needle out at centre of bottom cross and insert at top of cross then bring out at centre of right and at centre of left. 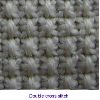
Also known as leviathan stitch and double cross stitch. This stitch can also be pulled.
A smaller version can be worked over two threads.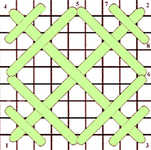
A larger variation is as shown. Work a large cross stitch over 8 thread intersections and then cross each leg twice as shown following the numbers.
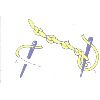
Work from left to right. Bring needle through at A then make a small stitch at right angles to stitch line and pull through. Pass thread over and then under the stitch on surface without needle entering the fabric. then hold thread down with left thumb and pass the needle again over and under the stitch on surface. Pull thread through to make a knot. Space knots evenly and fairly close for best effect. Also known as double knot stitch, old english knot stitch,tied coral stitch and palestrina stitch.

Working from right to left bring your needle out at A. Lay the thread flat along the line you are working and take a large slanting line across this line from B to C. Before pulling through twist the thread first over and then under needle as shown.
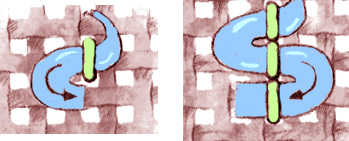
Cottons are used in vertical stitches to couch ribbons in place as shown. The ribbon only passes through the fabric at the top and bottom of the flower.
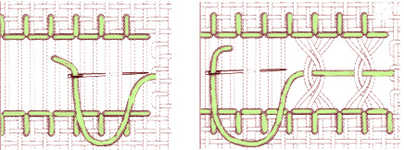
Draw out a few threads from the fabric. Fasten thread at left and then pass thread from right to left under an even number of the border threads bring needle out turning the needle to face horizontally and then make a second stitch over the same number of threads at right angles to the first. A second row of stitches is worked at the other edge of the border by taking half the threads from one group and half from the next as shown and as in ladder stitch.
Bring a thread out at the centre between hem stitches and pass over four threads, turn the needle and pass it under two threads from left to right. Turn again, pass over four threads and repeat. See also tied hemstitch and beaded somersault stitch.
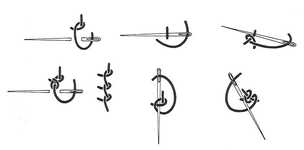
A free embroidery knotted stitch which is worked horizontally. In rows it may be detached or worked diagonally or vertically.
Work horizontally as for regular stitches but make the tail of the first stitch long, the second short and tight.
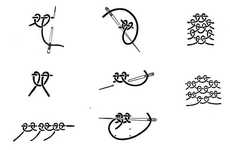
Work vertically, starting with regular sorbello. Bring the needle below for the start of another square. Thread alternatively through the outside loops of the previous stitch and the inside loops. One or more loops may be threaded on each of the previous ones to make a thick braid like pattern. Use firm thickish threads or fine stiff ones for lacy results.
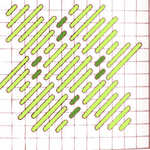
Work in diagonal rows with stitches over 1,2,3,2,3,2 and 1 thread intersections as shown in the diagram. When starting the second and subsequent rows, note from the diagram how the stitches interlock and that two tent stitches are worked in the gaps in either a contrast thread or colour.
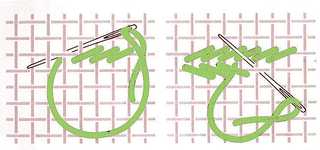
Begin at upper right and work rows alternately from right to left and left to right. Each stitch is worked over one horizontal thread and two vertical as shown. Also known as kelim stitch.
Buttonhole stitch is worked in groups of 2 or 3 with the space between each group larger than that between each stitch.
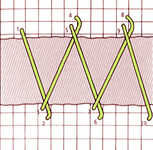
Work from left to right over 4 horizontal and 8 vertical fabric threads. Come up at 1 and down at 2 and come up again at 3, one thread inside 2, making sure that the yarn is under the point of the needle before pulling it through. Then go down at 4 and up at 5. The stitch can be altered by working it over different numbers of vertical and horizontal threads working it closer together to use as a filling stitch or further apart for couching ribbons or threads.
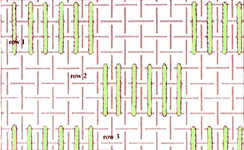
This is worked in horizontal rows in groups of 6 stitches over four threads. There are seven fabric threads between each group. When working the second row the group of six stitches fits below an unstitched area. This can be scaled if required e.g. 5 stitches with six threads between groups.
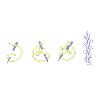
This is quite a difficult stitch until the rhythm has been discovered. Make sure that the needle points well outwards to leave sufficient room to work comfortably. Start at top of stitch line. Bring thread through and hold down to the left with your left thumb. Make a slanting stitch from left to right as shown in the diagram, bring needle out above working thread. Hold down to right, then take a slanting stitch from left to right and pull through with needle over working thread as shown in the diagram. Make another stitch to the left, then another to the right and so on, holding last loop with a tiny stitch.
Also known as twisted zigzag chain stitch.
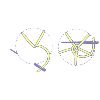
Work a fly stitch with its centre in the centre of the circle to be filled and caught down with a stitch to the bottom of circle. Then work two straight stitches, one each side of last stitch, from edge to centre of circle, dividing circle into five as shown in diagram. Weave under and over stitches as shown until the circle is filled. In drawn thread work or hardanger, only half the circle is filled.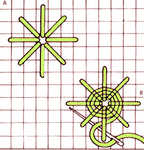
The counted thread stitch is very similar. Set up spokes of the required length and then bringing up the needle as close as possible to the centre and without piercing the fabric work over and under the spokes alternately. Pack the thread tightly as you go. Also known as ribbed spider stitch.

Stitches should be very small. Work from left to right. Bring needle through at end of stitch line and make a small stitch over line piercing the working thread with the needle as shown in the diagram.
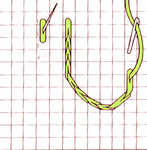 The counted thread version can be used to form curves on canvas.. Bring the needle up at one, go down at 2 usually 2 canvas threads away. Bring the needle up at three mid way between 1 and 2 piercing the thread in the middle Take the needle down at 4 and come up again at 2 piercing the thread again. Continue in this way.
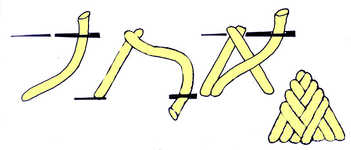
Start with two stitches of equal length as shown and then complete the triangle with closely packed threads.

Work a long oblong cross stitch over twelve horizontal and three vertical fabric threads and then seven straight stitches over three vertical threads as shown. The stitch to the right is worked three horizontal threads down from the first, working from left to right and top to bottom. When the area is filled work small oblong stitches at the top and bottom of each spring to fill in as shown.
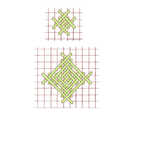
This starts with a cross stitch over two fabric thread intersections which is then enclosed by a group of four herringbone stitches. For symmetry the last stitch of the four is passed under the first before going back through the fabric. Each square is larger than the last and the size of the finished stitch can be increased or decreased by the number of rows. The diamond shapes are worked in rows so that the rows interlock and the gaps between the edges can be filled by straight stitches.
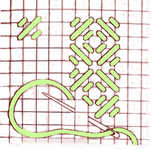
The stitch is composed of small blocks of three stitches each. Begin with a tent stitch over one intersection and then one thread down over two intersections and one thread to the right over one intersection again making a small square. Adjacent block slope in the opposite direction as shown giving a checkerboard effect.
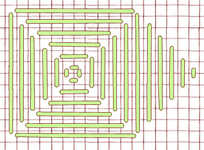
Worked over large areas this makes a diamond pattern and then a square pattern again over larger areas when four diamonds are made. Each triangle is worked over 1, 3, 5, 7, 9, 11 threads of fabric as shown. Also known as flat square stitch.
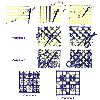
There are several variations on the basic all starting with the same basic block of squares. Come up at one side of the shape and make a long stitch across going down on the other side fill the whole shape with parallel lines about quarter of an inch apart. Then lay threads in the opposite direction making perfect squares. Tie these squares down at each corner with small stitches each slanting in the same directions as shown.
Variation 1. - Using a contrasting thread, diagonally criss-cross the whole design with long lines crossing the centre of every other square, then in the other direction so that the threads cross in the centres of the basic squares. With another contrasting thread tie down these diagonal lines where they cross in the centre of the squares. This stitch should touch the basic squares at the top and bottom.
Variation 2 - Make the basic squares and tie down intersections as before. Then with a contrasting thread criss-cross the whole design across the intersections of every other square as shown. Tie down with another contrasting thread.
Variation 3:- Work four detached chain stitches converging at one point as shown. Place them in a chequerboard fashion leaving four empty squares between each block. Then work four french knots close together in the corners of the empty squares, using a contrasting colour.
Variation4: - Work as Variation 3 but leave a clear line of squares around the blocks of detached chain stitches, then work five slanting satin stitches in the blank square connecting the corners of the blocks as shown.
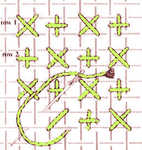
Cross stitches over two fabric threads are alternated with upright crosses also over two threads in the same or contrasting colours.
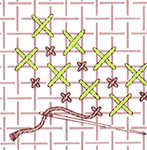
Rows are worked diagonally as shown with rows of cross stitches over 2 threads of fabric alternating with rows of small scale cross stitches.
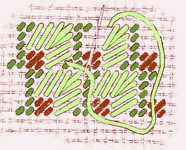
First work the tent stitch grid, then the square and the ray filling as illustrated. Different effects can be achieved with different shades.
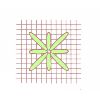
This consists of eight stitches worked from the same centre. It is usually worked in diagonal rows as it is a very open stitch.
Start with top right diagonal stitch, work to centre and then bring needle out again at top to work vertical stitch to centre. Continue round star in this way.
Also known as algerian eye stitch and star stitch.
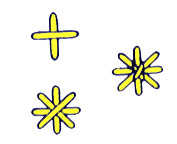
Work a cross stitch and then another of equal size across it and finish with a tiny cross stitch in the centre over the intersection of the first two.
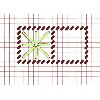
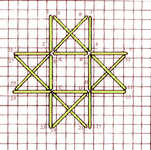
Follow the numbers in the chart carefully for the order of the stitches which outline the star, pulling the thread tightly as you go. Work diagonally down the area so that the starting point for the second rosette shares the holes in steps 11 and 16, and step 27 of the second shares the holes at step 17 and 21 of the first The lettered stitches are worked afterwards and can be stitched in a contrasting colour.
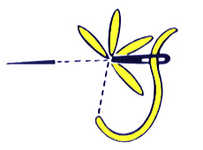
The free embroidery version is worked of simple straight stitches as shown. Six are illustrated but any number can be used.
As a counted thread stitch worked to form a six thread square. 
The star consists of eight stitches each worked from the outside to the centre over three threads or intersections as shown. Also known as star eyelet stitch and algerian eye stitch.
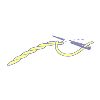
Work from left to right. Bring needle through at end of line, then insert a little way to the right. Bring out again a little to the left, thus making a long step forward and a little one back. The thread should be kept below the needle. When working a piece of free embroidery which can also be seen from the reverse, such as table linen, the reverse appears like running stitch you can then whip those stitches on the reverse to give a similar appearance to the front. Work each whipping stitch in the same direction and do not pierce the material.
There is also a counted thread version of stem stitch as shown in the diagram.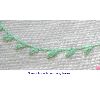
Variations are portuguese knotted stem stitch, stem with buttonhole, stem with twisted chain and half portuguese stem stitch.
Also a basic smocking stitch. After the fabric has been gathered in pleats this is used close to the tacking stitches. The thread is kept below the needle and a stitch is made into each successive pleat.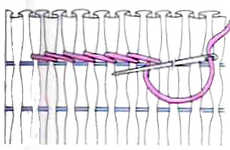
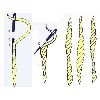
Work a row of stem stitch coming up at A, down at B and up again into the back of previous stitch at C. With each stitch slant the needle a little more and take in more fabric until a widening band of satin stitch is formed as shown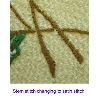

Work a stem, then work a buttonhole loop by the side on the right, the needle again can be taken by the side or through the top of the stem. Continue with stem and buttonhole.

Blocks of five satin stitches are worked in squares as illustrated.
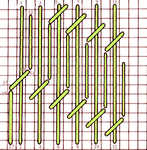
Lay the threads to be couched vertically on the fabric between two fabric threads, making a long stitch behind the work to keep the tension, laying the second thread two fabric threads away. Then work the couching stitches across the threads laid down and along between them following the numbers for the order in which the threads are to be worked, using a fine thread. If any curved areas are to be worked set up the vertical threads to be couched from edge to edge of the design, then work the couching stitches counting carefully as you go.
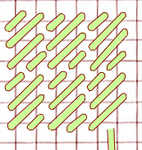
It consists of four small diagonal stitches filling an area of two vertical and three horizontal fabric threads. It is worked in rows either vertically or horizontally.

Work from top to bottom. An elongated stitch as illustrated.
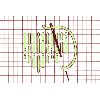
Worked with vertical stitches as shown in the diagram each row is worked in the same holes as the row below, leaving no gaps and four rows form the pattern.
Also known as long stitch
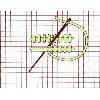
This is often trammed to make it more hard wearing Work trammed stitch from left to right then pull needle through one thread down and one thread to the left, then insert it over two threads directly above to form upright stitch and come out in position for next stitch two threads down and one to left. Continue like this row after row.
This is also known as upright gobelin stitch.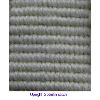
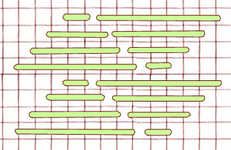
The rows run alternately from left to right and right to left working stitches over two, four, six and sight fabric thread intersections as shown.
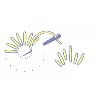
The stitches need not all be the same length but they should not be too long or too loose. Bring needle out at beginning of stitch, insert at end and bring out again ready for next stitch.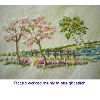
The most popular available are Anchor, DMC and Madeira and they all have a large number of shades. These threads are usually split into fewer strands to work.
It was very popular in Elizabethan times in England and was worked mainly in silks but seemed to go out of fashion in the late 1700`s.
Stitched used include raised seeding, raised rope stitch, looped stem, raised close herringbone, puffy couching, raised needleweaving, raised chain, raised buttonhole, raised stem, raised spider's webs and ladder stitch.

Instead of carrying the thread behind the work a tiny stitch of one or two threads is picked up and the next stitch worked from there.
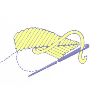
Instead of carrying the thread behind the work a tiny stitch of one or two threads is picked up and the thread carried over the surface to the other side.
Also known as laid work.
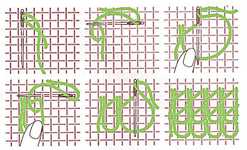
Start at lower left and work all rows left to right. For first stitch of each row hold thread end on right of canvas. Work a vertical stitch over two threads and then a horizontal stitch over two threads holding the thread under the needle and coming out at the starting point. Pull through and repeat but this time holding down the required length of loop. As with all pile stitches the loops can be cut or uncut.
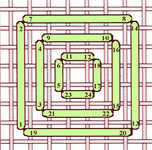
This is worked in squares following the numbering shown. It can be worked in horizontal rows.
There are two basic stitches straight and loop stitch.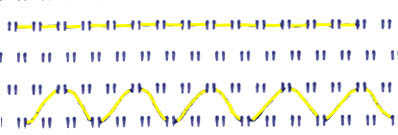 Straight stitches are threaded between loops either in a straight line or in a pattern and go through a float only once.
 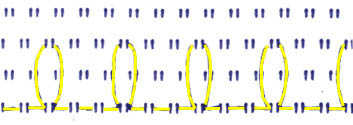 Loops are worked first through one float and then another returning to the first and passing through again. Although the stitches are simple they can be worked into very elaborate designs mainly used for household linens.


