Cross stitch, Needlecraft and Embroidery Glossary: Oblique gobelin stitch to Overlaying
A comprehensive illustrated needlecraft dictionary with clear definitions and working diagrams. Includes 766 terms used in cross stitch, embroidery, tapestry, blackwork, and goldwork. (Click thumbnails to enlarge.)
This is often trammed in needlepoint. Bring needle through and up right diagonally across fabric over two inter sections to form the first stitch, insert needle and pull through one thread left of base of previous stitch to form the next stitch. Continue in this way in this row and following. This stitch can up worked over up to five horizontal fabric threads and one or two vertical fabric threads. 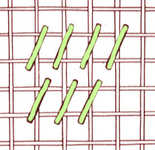
This also known as wide gobelin stitch or slanting Gobelin stitch.
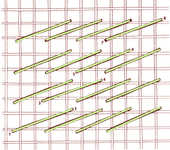
This is worked diagonally from bottom to top, left to right following the numbers as shown. It can also be worked in rows horizontally.
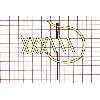
Working from right to left bring needle out at lower right hand, insert four threads up and two to the left, bring out four threads below, thus forming half oblong cross stitch. Continue along row and work second half of the cross on return.
It can be worked in either direction but must be consistent.
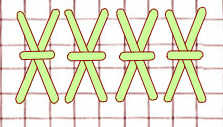
Working from right to left bring needle out at lower right hand, insert four threads up and two to the left, bring out four threads below, thus forming half oblong cross stitch. Continue along row and work second half of the cross on return.
It can be worked in either direction but must be consistent. When the area to be worked is filled, a row of backstitches is worked over the centre of each row of oblong cross stitch, in the same or contrasting thread.
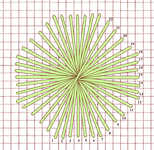
A variation on rhodes stitch which makes a raised surface. It is worked in the same way as rhodes stitch with each stitch moving one thread in an anticlockwise direction from the previous but the outline is octagonal rather than square. Follow the numbering from 1 to 22 for the starting point of each stitch which passes over a central point.
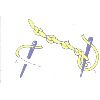
Work from left to right. Bring needle through at A then make a small stitch at right angles to stitch line and pull through. Pass thread over and then under the stitch on surface without needle entering the fabric. then hold thread down with left thumb and pass the needle again over and under the stitch on surface. Pull thread through to make a knot. Space knots evenly and fairly close for best effect. Also known as double knot stitch, tied coral stitch, smyrna stitch and palestrina stitch.
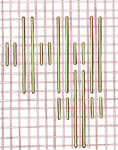
Work alternating long and short stitches as shown, with the long stitch over six fabric threads or more. An economical and quick to work stitch but the threads can be caught easily.
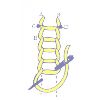
Bring needle through at A, hold thread down with left thumb, insert needle at B and bring out at C, keeping thread loose. Holding thread down again, insert needle at D and bring out at E. Continue in this way.
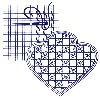
Outline the shape with two rows of trailing side by side worked one after the other. Then cut and draw out threads within the shape, cut two and leave two threads in each directions, just inside the trailing. With fine thread in a blunt (tapestry) needle, whip the remaining threads together as shown in both directions.
Then a squared filling pattern can be used on top.

Bring thread out just left of centre of shape and take it up to the right edge diagonally. Bring needle out again on left edge of shape and take just to right of centre diagonally. Bring thread through again just to left of centre a little below, and repeat from beginning.
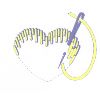
The first row of stitches are alternately long and short stitches and the following rows are stitches of an even length until the last row of the area where stitch length is varied to finish the filling. 
This can be used with fine shading colours. A version called surface long and short stitch is more economical with floss. Other names for this stitch are long and short stitch, shading stitch, tapestry shading stitch, plumage stitch, feather work and embroidery stitch
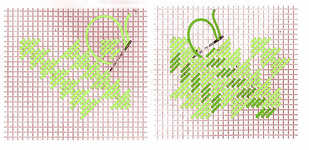
Start with rows of Milanese stitch as in the diagram over two intersections, three, four, five and two again. The second row is worked downwards over five, four, three, two intersections but instead of interlocking the longest stitches are adjacent leaving space for groups of three diagonal stitches over two intersections which can be worked in a different shade as shown.
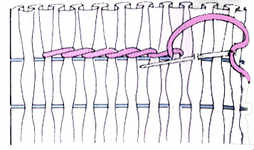
After the temporary stitches have been worked, this basic smocking stitch is worked slightly above. It is not very elastic and serves to keep the work taut. Pick up a pleat just above the gathering thread. Keeping the thread above the needle, make the stitch from left to right. Stitch into each successive pleat.
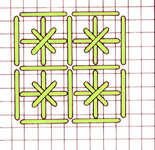
Work double cross stitches and then work straight stitches over four threads horizontally and vertically as shown.
Bring needle through below stitch line, then work over line and bring needle through below line to the right. Repeat.


