Cross stitch, Needlecraft and Embroidery Glossary: Lace stitch to Lurex threads
A comprehensive illustrated needlecraft dictionary with clear definitions and working diagrams. Includes 766 terms used in cross stitch, embroidery, tapestry, blackwork, and goldwork. (Click thumbnails to enlarge.)
Work from right to left. Begin four threads in from end of stitch line and work two horizontal stitches from this point to the end of line. Bring needle up at starting point and make two stitches to point four threads up and two threads to the right. Bring needle through four threads to left of point and work two stitches back to point, bring needle through again four threads to left. Make two stitches to starting point and then bring needle through four stitches to the left ready to start next stitch. Continue in this way. Also known as point turc, three sided stitch, turkish stitch and bermuda faggoting
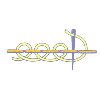
Work a row of backstitch. Interlace with a contrasting or toning thread as shown in the diagram. Also known as Pekinese stitch, forbidden or blind stitch.
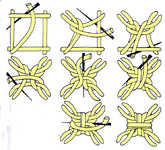
Start with a square of threads as shown and following the diagram weave the needle over and under without passing through the fabric again until the stitch is completed.
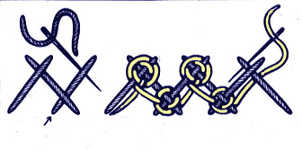
First work a row of herringbone stitch but in a slightly different way with the thread being taken under rather than over the first stitch as shown. The interlacing is worked on the front of the fabric with the thread being taken under the first stitch and then encircled twice round the crossed stitches at the top, the thread being taken over and under alternately and then brought down to the lower edge and encircled one and a half times around these crossed stitches and so on as illustrated.
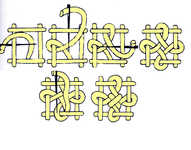
First worked a square of threads as shown and then weave the needle over and under without entering the fabric again until the complete stitch is worked.
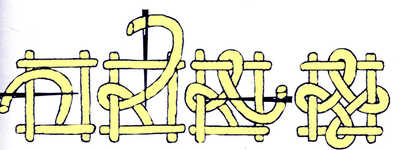
First worked a square of threads as shown and then weave the needle over and under without entering the fabric again until the complete stitch is worked.
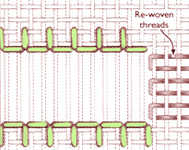
Draw out two or three threads from the fabric and then turn up the hem to one thread from the withdrawn thread. Fasten thread at left and then pass thread from right to left under two of the border threads bring needle and turn to face horizontally. Then make another stitch over two threads at right angles to the first as simple hem stitch. A second row of stitches is worked at the other edge of the border as in diagram. See also zigzag hem stitch, tied hemstitch, somersault stitch and beaded somersault stitch.
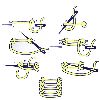
Using a blunt (tapestry) needle come up an A and insert the needle at B. Come up again at C a little to the left and above B and insert the needle at D immediately below B, bringing the needle out again at E which is below A. Without going through the fabric make a knot by slipping the needle through the first stitch from F to G and pull tight. Then pass the needle though at the other side from H to J through the cross of the first two stitches. Insert the needle just below D at K and come out again at L. Again without going through the material slip the needle from M to N under the cross made by the stitch above and again on the right from O to P. Repeat until the bottom of the shape.
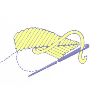
All the thread is kept on the surface. Instead of carrying the thread behind the work a tiny stitch of one or two threads is picked up and the thread carried over the surface to the other side.
Also known as surface satin stitch.
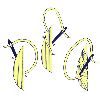
Cover area with laid work then come up and A and down at B. This stitch lies across the widest area of the shape to set the correct angle for the following stitches. Come up at C and down at D making a line parallel to the first and about a quarter of an inch above it. Continue upwards and then downwards from the centre until the whole shape is laid with parallel lines. These lines must then be tied down with small stitches coming up at E and going down at F, and each small tied stitch spaced half way between those of the row above.
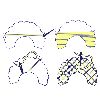
This is worked with only small stitches on the reverse. Start at the widest part of the shape. Come up and A and down at B, up again at C adjacent to B and down at D adjacent to A. Continue is one direction and then starting at the centre again fill in the remaining area. The cross bars are laid on top again starting at the widest area, coming up at E and down at F and up at G and down at H, but the lines although still parallel are about one quarter of an inch apart. When the first diagonals are complete another set are laid to make perfect diamonds. A small stitch is then made at each intersection to complete.
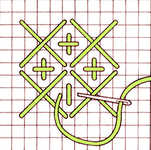
First work large scale cross stitch over four threads over the whole area and then add small upright crosses worked over two threads in the diamond shaped spaces with the horizontal stitch on top. Complete each cross as you go and don`t work half crosses around the edges. The large crosses and upright crosses can be in contrasting colours.
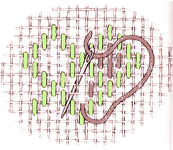
Two versions are illustrated suitable for smaller or larger areas. Both are worked with vertical straight and the effects are best achieved using more than one colour.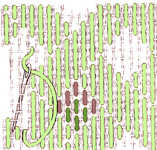
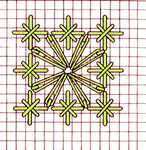
Work 8 double cross stitches as shown and then 8 lazy daisy stitches all radiating from the hole in the centre and anchor them down between the double cross stitches as in the diagram.
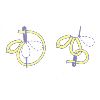
It is worked in the same way as chain stitch but the needle is inserted again just below thread to hold it down.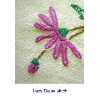
Also known as detached chain stitch or daisy stitch. A variation called long tailed lazy daisy stitch has smaller loops and longer tying down stitches made towards the centre.
The counted thread variation is worked similarly as shown. Form a loop at the centre of the petal and hold this loop down with a second small stitch two diagonal intersections from the base.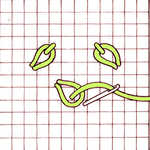
This is also a basic stitch in ribbon embroidery where it is used to make flowers and leaves. 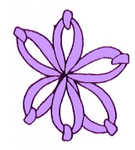
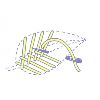
For a free embroidery stitch, Start at the bottom of the shape. Bring needle through to left of centre and make a diagonal stitch to the right edge. Bring needle through to right of centre, level with starting point and make a diagonal stitch to the left edge. Bring thread up again to the left of centre just above the starting point and continue in this way. 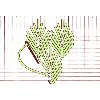
To work the counted stitch, make four diagonal stitches above each other over four intersections, then next stitch one stitch up over four threads vertically and three horizontally. The next stitch one up worked over four vertically and two horizontally. The next stitch two threads up worked vertically over three threads to form the apex of the leaf and the other side of the leaf in the same way. Continue as shown leaving no gaps between motifs.
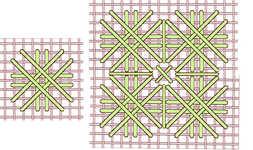
Work a single cross over four threads. Bring needle out at centre of bottom cross and insert at top of cross then bring out at centre of right and at centre of left. 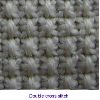
Also known as double cross stitch and smyrna cross stitch.
It comes in a range from fine 55 count to rustic rough cloth of 14 count.
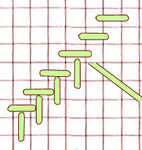
This stitch is worked from bottom left to top right and back again, first working the horizontal stitches and then the vertical on the return. All stitches are worked over two threads
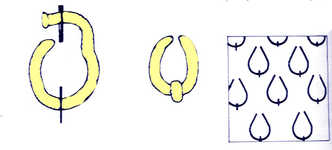
These lazy daisy stitches are worked in regular rows with alternate rows moved across a space as shown. Also known as link powdering and detached chain filling.

These lazy daisy stitches are worked in regular rows with alternate rows moved across a space as shown. Also known as link filling stitch and detached chain filling.
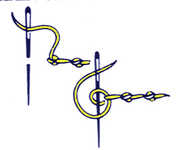
Work from left to right. Bring needle out at the end of the line. Make a small vertical stitch on the line towards the left. Holding the working thread down with the thumb, slip needle under the first stitch from top to bottom without going through the fabric. Pull thread through until a loop is formed, pass the needle under this loop and pull thread away towards the left.
Also known as knotted chain stitch.
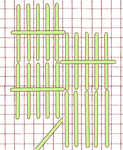
This is a quick background or filling stitch. As shown five vertical stitches are worked over six threads with one horizontal straight stitch but the number of threads can be altered. To stagger the rows the block must be worked over an even number of threads.

First work a row of vertical straight stitches from left to right. Then work back lacing thread through stitches as shown in the diagram. Then lace the other side the other side of the stitch in exactly the same way.
The lacing thread can be a contrasting one slightly thicker if required.
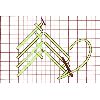
Worked in two separate rows starting from lower left hand corner. Take needle diagonally up to right over six intersections, insert and bring out two threads below. Take up to the left over two intersections and bring out two threads above starting point ready for next stitch. Continue to end.
The second row is worked in the same way except that the cross is formed at the bottom of the long stitch.
Also known as the fishbone stitch.
The free embroidery stitch is used to shade large areas in silk and crewel embroidery . 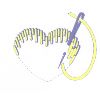
The first row of stitches are alternately long and short stitches and the following rows are stitches of an even length until the last row of the area where stitch length is varied to finish the filling. 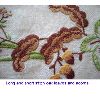
This can be used with fine shading colours. A version called surface long and short stitch is more economical with floss. Other names for this stitch are embroidery stitch, shading stitch, tapestry shading stitch, plumage stitch, feather work and opus plumarium.
 The counted thread stitch is worked alternately from left to right and right to left. On the first row stitches over two and four fabric threads alternate and on the return a stitch over two is below a stitch over four and a stitch over four is below a stitch over two as shown.
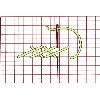
Work from left to right. Start at bottom left and work the bigger part of the stitch to top right, then bring needle through below at bottom right and work up to top left, which is only halfway to the starting point. Bring needle up below to start next stitch.
Also known as Plaited slav stitch and long legged cross stitch.
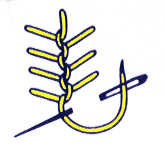
Work from top to bottom. Bring needle up at top of line to be covered. Insert to left and a little lower down. Bring out in centre and draw needle through over working thread. Continue in this way alternating sides. See also feather stitch.
Also known as persian stitch, cretan stitch and when worked in a straight line as quill stitch and alternating buttonhole stitch.

Work from left to right. Start at bottom left and work the bigger part of the stitch to top right, then bring needle through below at bottom right and work up to top left, which is only halfway to the starting point. Bring needle up below to start next stitch.
Also known as Plaited slav stitch and long armed cross stitch
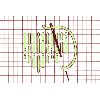
Worked with vertical stitches as shown in the diagram each row is worked in the same holes as the row below, leaving no gaps and four rows form the pattern.
Also known as straight filling stitch.
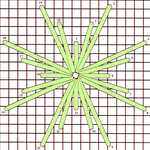
Used in hardanger designs, this is worked from a central hole following the numbers in the diagram.
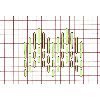
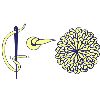
Bring your needle out at A and twist the thread once around the needle. Pull gently so that the thread fits around the needle and still holding the thread so that it doesn`t loosen, insert it at B about a quarter of an inch away from A. Pull gently through. Also known as italian knot, long tailed french knot and french knots on stalks.

Bring your needle out at A and twist the thread once around the needle. Pull gently so that the thread fits around the needle and still holding the thread so that it doesn`t loosen, insert it at B about a quarter of an inch away from A. Pull gently through. Also known as italian knot, french knots on stalks and long tack knot stitch.
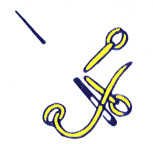
Hold thread down with thumb, insert needle close to where it emerged and bring out a short distance away. Bring needle out again within loop and make a long tying down stitch worked towards centre as illustrated.
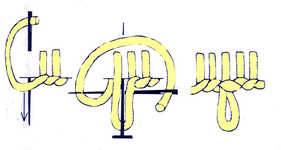
This is worked at intervals along a buttonhole edging as illustrated with the use of a pin making it easier.

Work from left to right. Bring needle through in centre of band. Insert needle a little to left of starting point at top of band and come through immediately below at bottom of band. Needle then loops the thread over the first stitch without passing through fabric as in the diagram.
Length and angle of stitch can produce variations.
Work as regular stem stitch, but use a heavy thread and leave each stitch loose to form a loop as shown
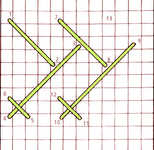
Work the stitches as indicated by the numbering in the diagram, working straight diagonal stitches in opposite direction. This stitch can be worked larger or smaller or in thicker thread if more dense coverage is required.
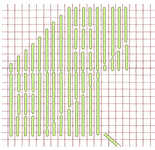
This is worked in vertical satin stitches as shown and can be used to cover large areas quickly.


