Cross stitch, Needlecraft and Embroidery Glossary: Kelim Stitch to Kreinik Braid
A comprehensive illustrated needlecraft dictionary with clear definitions and working diagrams. Includes 766 terms used in cross stitch, embroidery, tapestry, blackwork, and goldwork. (Click thumbnails to enlarge.)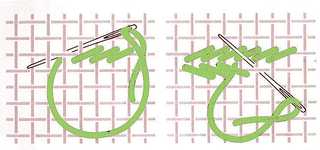
Begin at upper right and work rows alternately from right to left and left to right. Each stitch is worked over one horizontal thread and two vertical as shown. Also known as Soumak stitch.
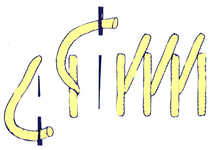
A straight vertical stitch is followed by a stitch of the same length worked from halway down at an angle and so on as illustrated.
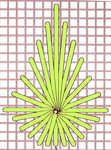
Starting at A work a straight vertical stitch over four fabric threads. Follow the diagram working counter clockwise and always down at the same hole.
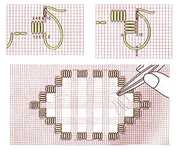
The basic block consists of five stitches worked over four threads. First secure thread end with backstitch and then work block of Satin stitch.
The next block can be on the same line leaving four threads between or at right angles as it the diagram where the first stitch of the second block shares a hole with the last stitch of the first block.
When the required shape is complete the four threads at the base each kloster block is cut and the threads carefully teased out, first in one direction and then the other. Weaving stitches can now be applied to the remaining threads of fabric.
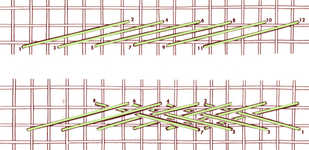
This makes a thick braid. Work all the left to right stitches first and then on the return the thread is woven under the last two stitches before it goes back into the fabric as shown.
Also known as railway stitch.
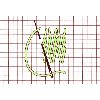
It can be useful in realistic figurative designs. Work from bottom to top and back again, bring needle out and insert four threads up and one to the right and then out again two threads down and one left, ready for next stitch. Continue in this way to end of row and then work downwards bringing needle out two to left and inserting at base of previous stitch.
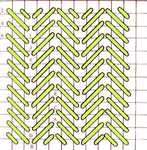
This is worked diagonally over two thread intersections as shown in the diagram. Follow the numbering for the first row and the letters for the second row, To achieve a straight edge add shorter stitches as shown. Further texture can be added by working a line of backstitch over two threads along the centre of each pair of rows.
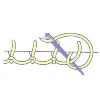
Bring thread through from back of fabric and work a buttonhole stitch loosely pass needle behind loop of stitch and over working thread as shown in diagram. It can be spaced out to make a lacy edging or worked close together. More rows can be made working over loops of previous rows.
Also known as Antwerp edging stitch.
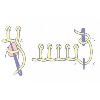
Work from left to right. Bring needle out on bottom line at A. Make a loop from right to left over left thumb and slip it on to needle. With loop still on needle insert needle at B and bring out directly underneath at C, holding thread under point of needle. Continue in this way.
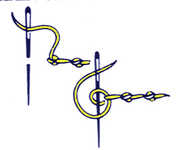
Work from left to right. Bring needle out at the end of the line. Make a small vertical stitch on the line towards the left. Holding the working thread down with the thumb, slip needle under the first stitch from top to bottom without going through the fabric. Pull thread through until a loop is formed, pass the needle under this loop and pull thread away towards the left.
Also known as link stitch.
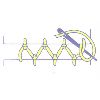
Work from left to right. Insert needle from below on bottom edge, then holding thread to the right insert needle into top edge from above. Then take needle behind both threads between edges and up with main thread below needle. Repeat on bottom edge then alternately top and bottom edges.
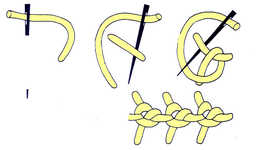
Similar to double knot stitch but worked with a wider base. It can be worked in lines, used singly or scattered randomly. Also know as basque knot.
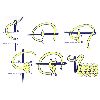
Bring the needle out at A, insert at B and bring out again at C where all three points are in a vertical line. Using a blunt (tapestry) needle, slide under the stitch between A and B, holding the thread under the needle as shown and pull flat. Repeat passing the needle under the stitch between A and B, and insert the needle into the fabric at D, coming out again at E. Pass the needle under the new bar twice and continue. At the end of the row at stitch holds the last buttonhole loop.
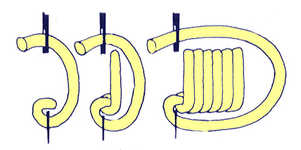
A variation of satin stitch worked as illustrated which makes one side slightly raised.
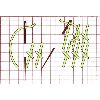
Working from bottom make long diagonal stitch six threads up and two across, insert needle four threads below and then take left diagonally across two intersections covering long stitch with a small stitch and bring out two stitches to left of starting point for next stitch.
The following rows are made in the same way but long stitches are placed between long stitches of previous rows.
Thicknesses #4, #8,#12,#16 and #32 all come in a large number of shades corresponding to those of blending filament. Since metallic threads are prone to unravel it is best to use a needle threader so that the end of the thread is disturbed less. 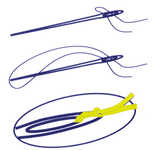
The diagram illustrates the best way to thread blending filament. For one strand leave a 5 centimetre ( 2inch) tail and for two strands fold the floss in half. Knot onto the needle as shown and then add the stranded cotton if using.


