Cross stitch, Needlecraft and Embroidery Glossary: Indian Drawn Ground stitch to Italian Shading
A comprehensive illustrated needlecraft dictionary with clear definitions and working diagrams. Includes 766 terms used in cross stitch, embroidery, tapestry, blackwork, and goldwork. (Click thumbnails to enlarge.)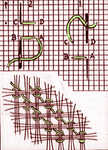
Start at at 1 on the diagram and bring needle out at A, inserting three threads to the left at B and out again three threads above at C. Insert again at D, three threads to the right and back out at A. The stitch is then repeated beginning at C and when pulled makes small circles as illustrated.
Before working the stitch tack the two edges onto glazed linen or a strip of smooth paper with just enough space between for the stitches.
Stitches used can be buttonhole, twisted insertion stitch, interlacing insertion, plaited insertion or knotted insertion stitch.
Also known as faggoting.
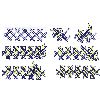
Make a band of double herringbone using only one colour. Using a tapestry needle and a contrasting colour, weave under and over the upper half of this foundation as shown in the diagram. In this first step, starting at A, the needle goes over, under, over, under, over, under and finally under both the working thread and the foundation. Continuing from B the needle goes over, under, over and under the foundation bars. Continue weaving to the end of the line, turn the corner. Starting from C the needle goes over, under, over, under both the working thread and foundation.
Then weave over the foundation bar and under both the working thread and foundation bar as shown.
Also known as german interlacing stitch.
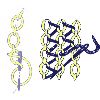
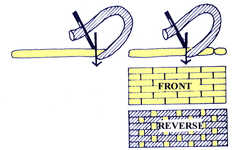
Bring needle out at top of stitch line. Hold the thread down with your left thumb while the needle is twisted first under and over the thread. Insert needle into the fabric at B and still holding the thread down, bring it up at C and pull through.
Rows of this stitch are then interlaced by a contrasting thread as shown.
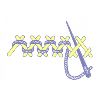
Work a row of herringbone stitch Then lace through it making small horizontal stitches over the crossed part of the herringbone with another colour of thread
Also known as threaded herringbone stitch.
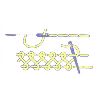
Work two parallel rows of backstitch with the ends of the stitches in one row level with the middle of the stitches of the other row. With a blunt needle and matching or contrasting thread, interlace top and bottom stitches alternately as shown in diagram.
Also known as herringbone ladder stitch.
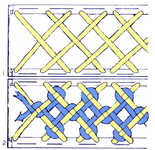
This makes a decoartive wide insertion. First work a row of double herringbone stitch into the edges of the fabric. Make sure the stitches pass over and under each other as shown then add the interlacing in the same or contrasting colour.
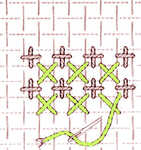
Firstly a horizontal row of upright cross stitches are worked over two fabric threads, followed by a row of cross stitches as illustrated.
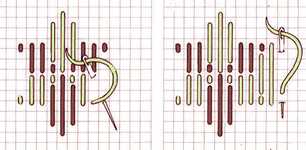
Work the upright diamonds as straight stitches over 4, 6 and 4 threads. The sideways diamonds which interlock with them are worked over 1, 3, 3 and 1 threads. Six diamonds make a six pointed star.
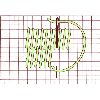
Work from left to right over five vertical and one horizontal thread. The second row is worked four threads below the first and the stitches thus formed will overlap the last thread of the previous row and make encroaching stitches.
This is a very good filling stitch for large areas and the reverse will look exactly the same as the front. Also known as Gobelin encroaching stitch.
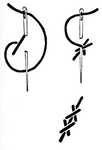
Based on stem with buttonhole. Work stem stitch, then work a buttonhole loop from left to right, across the stitch, with the needle entering the fabric at the top of the stem stitch, but coming out away from and half way down the length of this stitch. Pull the needle thread upwards to produce the cross. Now take the needle back into the fabric to emerge by the stem stitch for the next one. The spaces between the crosses may be varied, short or long as required. The final result gives a raised, twisted cord like stitch.
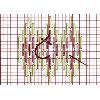
The diagram shows one example.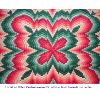 It is normally worked only in one direction but it can also be worked in four directions giving a kaleidoscope effect.
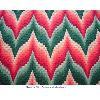
Also known as florentine stitch, bargello stitch and flame stitch.
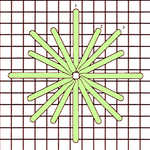
Worked clockwise from a central point as the numbers show, this is a decorative stitch, useful in hardanger.
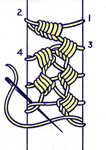
Tack the two edges of fabric to stiff paper leaving a space of at least half an inch between the, Bring needle through at point 1 and insert it back to front at point 2. Work four or five buttonholes over this thread and then insert the needle again on the right hand side a little lower down at 3.and back again a little lower down again at 4. Four buttonhole stitches are now worked from the centre outwards over the two threads at 3 and the thread then inserted lower down again on the right hand side. and so on as illustrated.

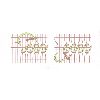
Work from right to left. Bring needle out and make a horizontal stitch across three threads, insert needle and bring out again at starting point. Then insert needle diagonally right three intersections up bringing it out again at starting point. Then insert needle three threads vertically above starting point and bring out again at starting point. Finish by working diagonal stitch back across to the head of the vertical stitch and bring out again three threads to left of starting point.
 .
. Draw out the threads from the fabric in the usual way and then miss the same number of threads and withdraw the same number from above. Working from right to left on the right side bring thread around four border threads to the left on the top band. Pass the needle over and behind the four threads and bring it out again at the starting point. Then take thread over fabric between bands and behind next four threads on lower band. Take needle over four threads and insert then bring out again on top band four threads to the left. Continue along the row.
The two other edges can be worked with simple hem stitch.
Also known as double hem stitch.
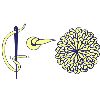
Bring your needle out at A and twist the thread once around the needle. Pull gently so that the thread fits around the needle and still holding the thread so that it doesn`t loosen, insert it at B about a quarter of an inch away from A. Pull gently through. Also known as french knots on stalks, long tailed french knot and long tack knot stitch.


