Cross stitch, Needlecraft and Embroidery Glossary: Fabric Count to French Stitch
A comprehensive illustrated needlecraft dictionary with clear definitions and working diagrams. Includes 766 terms used in cross stitch, embroidery, tapestry, blackwork, and goldwork. (Click thumbnails to enlarge.)It can be measured as the number of threads to the inch or the number to 10 cms
Before working the stitch tack the two edges onto glazed linen or a strip of smooth paper with just enough space between for the stitches.
Stitches used can be buttonhole, twisted insertion stitch, interlacing insertion, plaited insertion or knotted insertion stitch.
Also known as insertion stitches.
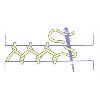
Work from left to right. Insert needle from below a little way in from edge. Then insert needle into top edge from below, a little to the right. Twist needle under and then over thread lying between the two edges then insert needle into bottom edge from below a little to the right. Continue working into each edge alternately twisting needle each time.
Also known as twisted insertion stitch.

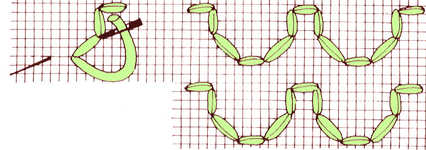
This is worked in horizontal rows. Work 5 straight stitches in the order given in the diagram with a second set using the same central hole. The longest stitch in the second row shares a hole with the longest stitch of the previous row, thus leaving spaces which can be filled with straight stitches.
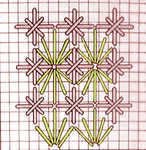
First work the double cross stitches with the upright cross over four threads followed by the fan stitches in the spaces. Working the two outer, then the two inner and the vertical stitch last gives a neater finish.
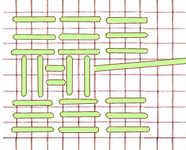
Also known as fancy bricking stitch, this has a textured appearance. It consists of three straight horizontal stitches over three threads in the first row, followed by small straight stitches over two alternating with pairs of vertical stitches.

Start at top of stitch line and bring thread through. Holding thread down with left thumb, make a diagonal stitch, inserting needle to right of stitch line and bringing it out on stitch line a little below starting point and above thread. then work in the same way but insert needle to the left of the stitch line. Continue alternating in this way.
Variations on feather stitch are single, straight, chained, closed, long armed and double.
The first row of stitches are alternately long and short stitches and the following rows are stitches of an even length until the last row of the area where stitch length is varied to finish the filling. 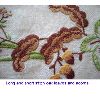
This can be used with fine shading colours. A version called surface long and short stitch is more economical with floss. Other names for this stitch are long and short stitch, shading stitch, tapestry shading stitch, plumage stitch, embroidery stitch and opus plumarium.
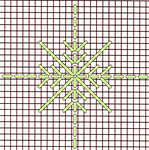
Work as shown in the diagram, a decorative stitch used when the fabric does not need to be covered as in hardanger.

A row of small upright evenly spaced stitches are worked and then joined by diagonal stitches. As a single row it can be used for a border but it can also be used as a filling stitch when rows are placed above each other in straight lines. When the slanting stitches are from bottom right to top left it is known as barrier or fence stitch and when from bottom left to top right it is known as Bosnian stitch or yugoslavian border stitch. Also known as zigzag Holbein stitch.
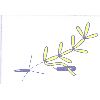
As a free stitch it can be used to hold down applied fabric. Start just below the top of the stitch line. Make a straight stitch to the left, another to the top of stitch line and another to the right, bringing thread up after last stitch on stitch line a stitch length below starting point. Repeat. 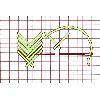
As a counted thread stitch it is simple and effective. Working from top to bottom, left to right, bring needle diagonally down to right over four intersections, insert and bring out two threads to the left, take up right across four intersections then insert and bring out one thread lower than the first stitch to begin next. Work second row in exactly the same way forming stitches in same side at right of previous row.
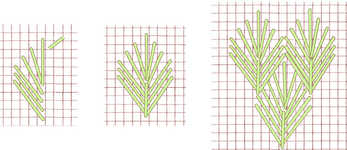
This is very similar to leaf stitch and also interlocks in a similar way. Each block is made of a central straight vertical stitch over six threads with five slanting stitches at each side and then another straight central stitch over four threads to complete.
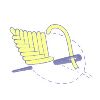
As a free stitch it can be used for a close border or for filling small shapes. Bring needle through at side of shape to be filled and make a diagonal stitch to two threads beyond centre. Bring thread up at other side of shape and make a diagonal stitch to two threads beyond centre, so that stitches overlap at centre. Repeat.
A padded variation is raised fishbone stitch. 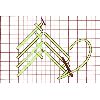
The counted thread stitch is worked in two separate rows starting from lower left hand corner. Take needle diagonally up to right over six intersections, insert and bring out two threads below. Take up to the left over two intersections and bring out two threads above starting point ready for next stitch. Continue to end.
The second row is worked in the same way except that the cross is formed at the bottom of the long stitch.
Also known as the long and short oblique stitch.
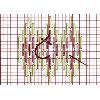
The diagram shows one example.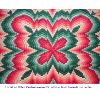 It is normally worked only in one direction but it can also be worked in four directions giving a kaleidoscope effect.
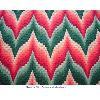
Also known as florentine stitch, bargello stitch and irish stitch.
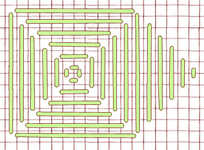
Worked over large areas this makes a diamond pattern and then a square pattern again over larger areas when four diamonds are made. Each triangle is worked over 1, 3, 5, 7, 9, 11 threads of fabric as shown. Also known as square satin stitch.

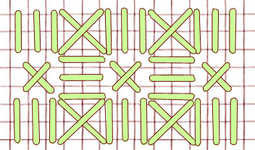
The pattern is worked in two horizontal rows worked alternately . The first row has three vertical straight stitches worked over three fabric threads alternating with Cross stitches worked over three diagonal intersections. The second row has three straight horizontal stitches worked over three fabric threads under the large cross and a small cross stitch over two diagonal threads worked under the straight vertical stitches.

The diagram shows one example. It is normally worked only in one direction but it can also be worked in four directions giving a kaleidoscope effect. This is called four-way Bargello or mitred Bargello.
Also known as bargello stitch, flame stitch and irish stitch.
The most popular available are Anchor, DMC and Madeira and they all have a large number of shades. These threads are usually split into fewer strands to work.
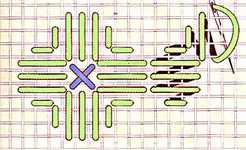
Straight Satin stitches worked over 2,4,4,4,2 threads and worked round to form a flower. The centre is worked with a cross stitch. Also known as satin stitch flower.
It is available in solid colours. Also known as nordin
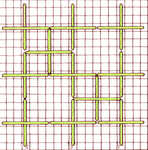
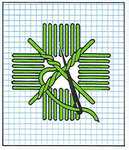
Start at 1 in the lower right corner of the area to be filled and stitch diagonally upwards working vertical stitches over six fabric threads, then work back downwards crossing these stitches with horizontal stitches over 6 threads as shown. Start the second row in the hole immediately left of the 12th thread away from the first row at 2. Work only full stitches. When these diagonals have been worked work these stitches from lower right to upper left starting at 3, the second cross being worked over a cross of the previous row. On both diagonals a horizontal stitch is always worked last.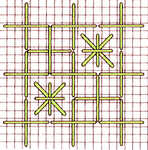
A variation is to add a Smyrna stitch over four threads in the centre of each large box created by the trellis, still remembering to work the horizontal stitch last.
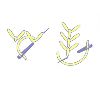
This stitch can be worked horizontally from left to right or vertically from top to bottom or singly. It is like an open chain stitch. Bring needle through to top left of stitch, hold thread down with left thumb, insert needle at top right of stitch and bring out at centre a little below with thread below needle. If working horizontally tie down with a short vertical stitch over the thread then bring needle through just to the right of the top right of stitch ready for next stitch. If working vertically, tie down with a slightly longer vertical stitch, then bring needle up to left of middle of stitch, ready to continue.
 Make one open fly stitch and then add two straight stitches to make five spokes as shown. With the same ribbon bring the needle out close to the centre and without piercing the existing ribbon weave over and under these arms around 10 to 12 times. Allow the ribbon to twist to form more realistic petals. If wished, the ribbon can be changed to a lighter shade after three or four rounds of the first shade. See also ribbon roses.
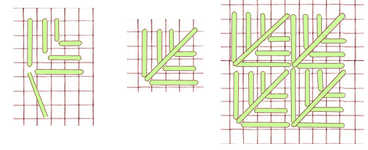
It is worked in blocks over five threads square and consists of three horizontal and three vertical stitches of graduated length and finished with a diagonal stitch over four intersections from bottom left to top right.
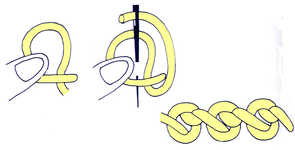
A loose loop is made around the needle and tightened after the needle has entered the fabric but before it is pulled through completely. Hold down the loop with the left thumb while pulling the needle through.
These knots are characteristic of the rich silk embroideries of China where they often are worked closely over large areas. Also known as Chinese knot, pekin knot and blind knot.
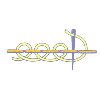
Work a row of backstitch. Interlace with a contrasting or toning thread as shown in the diagram. Also known as laced backstitch, Pekinese or blind stitch.

This can be used singly randomly or in lines. Male a vertical straight stitch, then loop around to form a knot without entering the fabric and then make the last arm of the cross.
Carry the yarn diagonally across the space, enter the fabric and then twist the threads over the first thread back to the starting point. The twisting of the second bar, the other diagonal is taken only as far as the centre, then pass the yarn over and under the bars twice in a circular motion. Finally complete the other half of the bar.
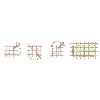
Work from right to left. Bring needle through at bottom right corner of first stitch. Insert needle four threads up and bring out again four threads to left of starting point. Insert needle at starting point and bring out four threads up and four threads to the left. Insert four threads to the right, bring out four threads to the left of starting point. For a single stitch work final side of square. For a row continue as before and pull all stitches firmly.
Twisted fly stitch is a variation.
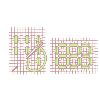
Work horizontal rows first. Work from right to left. Make two vertical stitches over four threads in the same place, then bring needle out four stitches to the left for next two stitches. Continue along row in this way and then work other horizontal rows in the same way turning fabric round for each. Turn fabric at right angles and work vertical rows in the same way as the horizontal rows.
Also known as punch stitch.
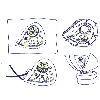
Embroider the required shape on fabric. Attach it to backing fabric with right sides facing leaving one section open. Turn to the right side and insert a loop of wire through the open end. Leave ends of wire long enough for use in attaching to main design. Attach by taking wire through to the reverse side. Stitch the last section closed and add any other embroidery detail.
A transfer printed design is often used as a guide to stitching. There are many stitches used including stem, satin, backstitch, bullion knots, buttonhole, chain, chevron, coral, couching, cretan, cross stitch, crown, darning, double knot, faggoting, feather, fern, fishbone, flat, fly, french knot, herringbone, interlaced band, leaf, lock, overcast, pekinese, roumanian, running, seeding, sheaf filling, spanish knotted feather, spiders` web, split, straight and wheatear.

Bring the needle through where knot is required and hold thread firmly with finger and thumb of left hand. Twist needle twice round thread. then still holding thread firmly, turn needle round to starting point and insert just behind it, gently pulling thread through. This stitch can be free or counted. 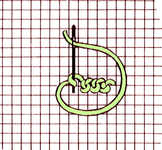
A variation is french knots on stalks.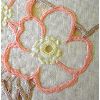
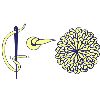
Bring your needle out at A and twist the thread once around the needle. Pull gently so that the thread fits around the needle and still holding the thread so that it doesn`t loosen, insert it at B about a quarter of an inch away from A. Pull gently through. Also known as Italian knot, long tailed french knot and long tack knot stitch.
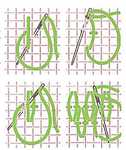
Begin at upper right and work rows from right to left and then left to right. For each french stitch form two tied down straight stitches both within the space of two vertical fabric threads. Start next stitch in second canvas hole from base of stitch just done. At the end of each row reverse working direction. Place new stitches between those of the row above so that tops share a hole with neighbouring horizontal stitches.
US Customers
We have an interim delivery system now in operation.Please be aware that the new import tariffs will be applied by US Customs.


