Cross stitch, Needlecraft and Embroidery Glossary: Half chevron stitch to Hungarian stitch variation.
A comprehensive illustrated needlecraft dictionary with clear definitions and working diagrams. Includes 766 terms used in cross stitch, embroidery, tapestry, blackwork, and goldwork. (Click thumbnails to enlarge.)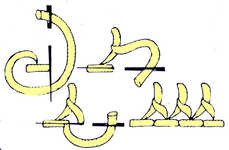
A variation on chevron stitch where a small stitch is worked on the line to be followed and the needle brought out again halway back along the stitch. Insert the needle at the required height and out again halfway down as illustrated.
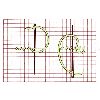
Work left to right from top of fabric, take needle diagonally up across an intersection insert needle and bring out one thread below, continue in this way to end of row. To work second row take needle down left over intersection and insert to form a new stitch always inserting needle in a vertical position. Continue this way row by row. On reverse the stitches will be vertical.
Also known as half stitch.
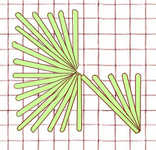
This is worked as eyelet or eye stitch with each block worked over four vertical and eight horizontal threads. The threads are very densely packed and seventeen stitches are worked into the central hole which may require it to be enlarged with a stiletto. Stitches must always be worked from front to back into this hole. the following blocks are dropped by half a pattern.
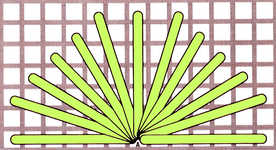
Work from left to right bringing the thread out at the bottom left and insert it at A.
Work clockwise as shown always going down at A.

The stem stitch is wrapped once, going through two stitches. The thread is kept above the needle which does not penetrate the fabric.
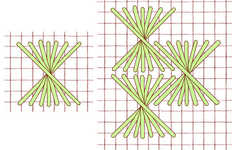
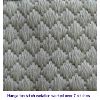
A variation on rhodes stitch this is worked in diagonal rows from the top left to bottom right with stitches interlocking on the row above. The first stitch is worked diagonally over six intersections and the following stitches are worked in an anti clockwise direction until seven have been worked.

Work left to right from top of fabric, take needle diagonally up across an intersection insert needle and bring out one thread below, continue in this way to end of row. To work second row take needle down left over intersection and insert to form a new stitch always inserting needle in a vertical position. Continue this way row by row. On reverse the stitches will be vertical.
Also known as half cross stitch.
Also a style of drawn thread work originally from Norway, worked on fine evenweave fabric. The area to be removed is first surrounded by satin stitch in pearl cotton or stranded cotton, known as Kloster Blocks. After the threads are drawn, weaving and filling stitches are used in the spaces .Special scissors and tweezers are useful when drawing..
Among the stitches used are cording, woven bars and four sided filling stitch.
Also known as drawn fabric work.
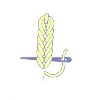
Bring needle through at top of each line and make a short stitch downwards. Bring needle up just below this stitch and pass the thread under the vertical stitch re-entering the fabric at the same place as it came out. Bring needle out just below this and pass the needle under the vertical thread again. Continue making stitches in this way passing needle under the two preceding loops.
Also known as braid stitch.
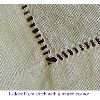
The first step is to draw out the threads from the fabric. Decide on the length of the hem and then withdraw the first thread two threads above this. To do this pull out the thread near the edge of the material and then take it firmly and pull right out from across the whole width of the material. The number of threads withdrawn will depend on the fabric and the pattern you intend to work. A fine fabric needs only a few threads taken out, a heavier fabric needs more.
When threads are taken out on all four sides of the fabric a little more care is needed. First mark the depth of the hem round each corner. The threads to be withdrawn must be cut a half inch in from the hem and only the centre threads taken out. These half inch lengths are then folded back so that they will lie in the hem. A square hole is left at each corner, the corner must be mitred before hem stitch is worked. The stitching may be worked with the drawn threads, or a thread of similar weight to the threads of the fabric. It should be strong and smooth but not too heavy, stranded cotton or Coton à Broder would be suitable for linen.
simple hem stitch, ladder hem stitch, zigzag hem stitch, double hem stitch, diamond hemstitch, tied hemstitch, somersault stitch, beaded somersault stitch or Italian hem stitch can now be used to finish the hem.
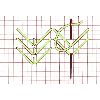
When used in drawn fabric work, it is best worked on the wrong side and when pulled tightly a raised effect is made. Work first from top to bottom making a diagonal stitches downwards over four intersections, insert needle and bring out two horizontal threads below starting point. Continue like this to bottom, then work second row upwards with diagonals in opposite direction.
When complete work a line of backstitch over two threads down the middle. Also known as closed herringbone stitch.
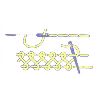
Work two parallel rows of backstitch with the ends of the stitches in one row level with the middle of the stitches of the other row. With a blunt needle and matching or contrasting thread, interlace top and bottom stitches alternately as shown in diagram.
Also known as interlaced stitch.
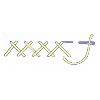
In the free embroidery version work from left to right. Bring needle out on lower line. Insert on top edge a little to the right and take a small stitch backwards along top edge. then insert on lower edge a little to right and take another small stitch to the left. The fabric lifted by the needle and the space between the stitches should be the same to achieve best effect. Continue in this way.
Variations on herringbone stitch include closed, threaded, interlaced, tied, double, barred and herringbone ladder stitch.
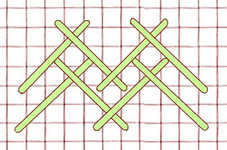 The counted thread version is worked in the same way, each crossed diagonal stitch is worked over four intersections and the rows interlock as shown.
Also known as double running embroidery.
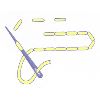
Work a row of running stitches, leaving the same number of threads between stitches as stitch length. then work back with another row of running stitches filling in the gaps left on the first row.
Also known as double running stitch.
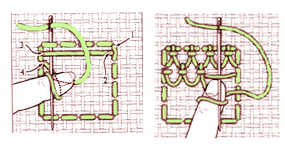
The area to be covered is outlined in backstitch with one strand of floss. Bring the needle to the front of the work and lay a thread across the fabric. Work across the laid thread as illustrated and repeat across each row without going through the fabric.
Also known as holy point, nun`s work and point lace.

The area to be covered is outlined in backstitch with one strand of floss. Bring the needle to the front of the work and lay a thread across the fabric. Work across the laid thread as illustrated and repeat across each row without going through the fabric.
Also known as hollie-point, nun`s work and point lace.
Start with squared filling. Fill the area with long horizontal stitches about quarter of an inch apart. Then lay threads in the opposite direction making perfect squares. With a blunt (tapestry) needle and a contrasting thread weave diagonally across the squares picking up the under thread of the foundation row as shown.
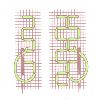
Work from top to bottom. Start at top left hand corner and bring thread through. Make a horizontal stitch across four threads to the right then bring out four threads down Insert four threads up and bring out again four threads down. Make a horizontal stitch to left across four threads then bring needle up four threads down. Take needle four threads up and then bring out four threads down. Continue in this way to bottom of row but do not work last stitch of sequence. Turn fabric round and work in same way as first row for second row. Continue. All stitches should be pulled firmly.

Two rows of threads are laid over the area, ine horizontail and one of the top left to botton right diagonal. Another set of diagonals are worked from top right to bottom left passing over the diagonal threads are under the horizontal threads. All threads pass through the fabric at the edges only.
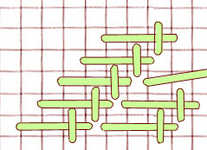
A variation on fishbone stitch, this forms a diagonal pattern. The stitches are worked from bottom left to top right with a horizontal stitch over four threads crossed by a vertical over two threads as shown. See also diagonal fishbone stitch.
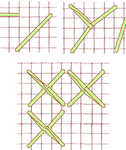
This is worked in squares of any size. Work a straight diagonal stitch from bottom left to top right and then bring the thread out at the top left of the square. Without going through the fabric loop through the first stitch and then take the thread back down at the same place. Bring the needle out at the bottom right of the square still without going through the fabric make another interlocking loop at the centre.
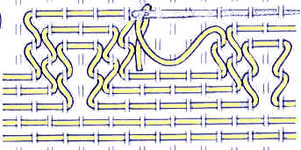
Threads used are usually pearl cottons, stranded cottons and sometimes soft embroidery cottons or wools. The needle picks up the floats rather than pierces the fabric a tapestry needle is used. Patterns are usually geometric in borders or motifs.
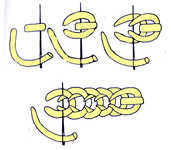
Make a small horizontal stitch to start and working from right to left, make a link which passes under this stitch without entering the fabric. The next link is passed under the first link and first stitch. The following loops are passed over, under, under, over the threads of the prevoius two links as shown.
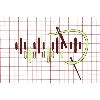
Worked in two colours from left to right, it consists of vertical stitches over two threads, four threads, two threads, miss one and so on. The second row in a different colour having the long stitch over the missing column of the previous row as shown.
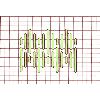
This consists of vertical stitches worked from left to right, over two threads, four threads, six threads, four threads, two threads and so on. The next row is worked with the shortest stitch above the longest of the previous row.